Monday, November 14, 2011

~Handmade Holiday Tradition/Esty Greetings Blog Hop: How To Make Danish Christmas Hearts~

Are you like me and have a lot of scrapbooking paper?  I have been looking for different and creative ways to utilize my papers especially the scraps.  Recently my in-laws went to DenmarkMy mother in-law knows how much I love to craft with paper so she brought me back this book: 
Inside there are about 150 Christmas heart patterns.  These paper hearts originated as a Danish Christmas ornament, but, filled with candy, flowers or a love note, it makes a great gift for anyone year round. 
Typically Norwegians don't put as many decorations on their Christmas trees as Americans, and most Norwegian decorations are hand made. Woven heart baskets decorations are typically made from good quality paper in two contrasting colors (often one of the colors is bright red). A good quality gift wrapping paper is a great material to use. Hang the little baskets on the tree either empty or with a few small treats in them. Virtually every school-age child in Denmark learns to make these woven hearts.
Today, with all the design variation, these can be also be used for Valentine's day, gift-tags, invitations, thanks-you cards, etc. It's fun to try all the various types of shapes that are available.
IMGHere is the basic Christmas heart pattern with instructions on how to weave along with the pattern.  Print out the pattern below and use it as your template.  The straight edge needs to be on the fold.  You will need to cut one of each color.  If the pattern is too small you can always enlarge it on a copier.  
Interested in learning more about Christmas traditions in Denmark?  Visit these websites to learn more:
Visit Denmark
Family Christmas Traditions
Holiday Traditions in Denmark
Danish Christmas Dinner Menu & Recipes


Sit back, relax and take a stroll though our Holiday Traditions Blog Hop. You'll find poignant stories, yummy recipes and great holiday printables.  Click the arrows above to go to the next blog in the hop. There's no time limit so feel free to browse our blogs - maybe you'll find a new tradition to start with your family!
 
Interested in more Danish Christmas heart patterns?  Become a fan of the Sno Valley Greetings facebook page and watch for more patterns to try out.

Tuesday, November 8, 2011

~Etsy Greetings Team: Holiday Boutique Sales Event~

Starting November 7th the Etsy Greetings Team is hosting a holiday boutique sales event.  It is a perfect way to stock up early on your holiday greetings and get a great sales price!  The event will run until November 14th.  Each shop is featuring a different sale.  To search all of the shops go to Esty.com and use search words “egholiday”.

My shop, Sno Valley Greetings, is offering 10% off your entire order.  At check out please type in HOLIDAY10 to automatically receive the sale price. 

Happy Shopping!

Monday, November 7, 2011

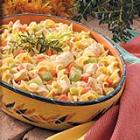
~Recipe Monday: Chicken Noodle Casserole~

This past weekend I really wanted to make a casserole for dinner.  With the weather getting colder it sounded perfect.  I had all the ingredients for this casserole so I gave it a try.  It must have been delicious because me and the hubby ate about half of the casserole! 

I had to use penne pasta and instead of cheddar cheese I used a cheese blend.  Prior to putting the casserole in the oven I sprinkled a layer of frozen peas on top then finished it off with a bread crumb and olive oil mixture.  I baked it for 20 minutes at 350 and it came out amazing!  We sprinkled some grated parmesan to make it a true pasta dish.

Prep Time: 20 minutes | Cook Time: 15 minutes | Ready In: 35 minutes
Ingredients
  • 2/3 cup chopped onion
  • 1 garlic clove, minced
  • 1 tablespoon olive or canola oil
  • 1 1/2 pounds boneless skinless chicken breasts, cut into 3/4-inch cubes
  • 1 (14.5 ounce) can chicken broth
  • 1 1/2 cups chopped carrots
  • 3 celery ribs, chopped
  • 1/2 teaspoon dried savory
  • 3 tablespoons butter or stick margarine
  • 3 tablespoons all-purpose flour
  • 3/4 teaspoon salt
  • 1/8 teaspoon white pepper
  • 1 1/2 cups 2% milk
  • 1 1/4 cups shredded reduced-fat Cheddar cheese
  • 8 ounces wide egg noodles, cooked and drained
Directions
  1. In a large nonstick skillet, sauté onion and garlic in oil until tender. Add chicken; cook and stir until no longer pink. Add the broth, carrots, celery and savory. Bring to a boil. Reduce heat; cover and simmer for 10-15 minutes or until vegetables are tender.
  2. Meanwhile, in a saucepan, melt butter. Stir in the flour, salt and pepper until smooth. Gradually add milk. Bring to a boil; cook and stir for 2 minutes or until thickened. Remove from the heat; stir in cheese until melted. Pour over chicken mixture. Add noodles; mix well.
  3. Transfer to a 3-qt. baking dish coated with nonstick cooking spray. Bake, uncovered, at 350 degrees F for 15-20 minutes or until bubbly.

*Recipe courtesy of All Recipes*

Sunday, November 6, 2011

~The Holidays Are Right Around The Corner~

Now that Halloween is over Thanksgiving and Christmas will soon be here.  Are you getting ready for the holidays?  Even though I shop for gifts year round there is still so much to do!  Every year there are things that I want to do and unfortunately I run out of time.  This year will be different.  Here are the things I have accomplished so far this year: 

  • I’ve been clipping coupons and stocking up on ingredients for turkey day.
  • I’ve dug up my recipes for Thanksgiving.
  • I was accepted to be a vendor at the Holiday Bazaar at the Si View Community Center in North Bend.
  • I have hand made approximately 150 holiday greeting cards that I plan on selling at the bazaar and in my etsy shop.
  • I’ve started to list holiday cards in my shop, Sno Valley Greetings.
  • I have about half of my Christmas shopping done. (yay!)

Here are my goals for November:

  • Make a food donation to the Mt. Si Food Bank.  Currently they need turkeys, click HERE for details on how and when to donate.
  • Finish the rest of my Christmas gift shopping.
  • Buy wrapping paper and maybe start wrapping gifts.
  • Continue to make cards and gift tags to sell at the holiday bazaar.
  • Decorate the house! (my favorite part)
  • Get our Christmas tree (this year we are looking for a 10 foot tree)

What are your holiday plans and goals you would like to accomplish?

Sunday, October 30, 2011

~How to make a paper wig~

While browsing Martha Stewart’s website this morning I came across this tutorial.  This is such a great alternative to buying an expensive wig that you may only wear once or twice for Halloween, plus it is eco-friendly!  

If you don’t like the “newspaper print” look you could always spray paint or spray glitter the paper.  Here are the directions to make this unique costume accessory:

Tools and Materials
Plastic grocery bag
Scissors
Round object to use as a head form (we used a cabbage)
Masking tape
Newspaper, thin colored paper, or curling ribbon for "hair"
Double-sided tape
Paper Wigs How-To

1. Cut down a plastic grocery bag to create a single sheet of plastic. Place plastic sheet over cabbage.

2. Apply strips of masking tape to plastic, overlapping each slightly, until you have formed the shape of a skull cap. Add two to three more layers of masking tape to create a firm wig base.

3. Remove cap from cabbage, and trim excess plastic around cap. To add extra support, place a few strips of masking tape around the edge and inside the skull cap.

4. Place cap back on the cabbage and begin styling the wig. Cut colored paper or newspaper to 1/2-inch strips, or cut lengths of curling ribbon to create hair. Curl "hair" by carefully dragging across the closed blade of a pair of scissors.

5. Add 4- to 6-inch strips of double-sided tape to the bottom rim of the cap, and begin adding hair. Continue adding more tape and "hair" strips until you reach the crown of the cap and the wig is full.

*Tutorial courtesy of MarthaStewart.com – for the original tutorial click HERE*

Wednesday, August 17, 2011

~Seashell and Pebble Stationery–DIY~

If you want to make your own stationery and have a lot of shells and pebbles laying around try this project courtesy of www.marthastewart.com.

The verbiage below is taken directly from Martha’s website:

Decorate stationery, postcards, or a travel journal using tokens collected on a recent trip. 

Lay shells or stones on thick paper, and spray the area with watered-down paint. Abstract patterns emerge on the paper underneath, recalling a dappled sky.

Sprayed Stationery How-To:


1. Cover your work surface.

2. Add 1 teaspoon acrylic paint to a small spray bottle. Fill halfway with water; shake to mix. (For a more translucent solution, add more water.) 

3. Arrange shells or pebbles on note cards or another paper item. 

4. Spray paint mixture over shells or pebbles. Let dry for about 30 minutes before lifting objects. 

Tip:  Card stock or other thick paper works best; it's less likely to warp.

Tuesday, July 19, 2011

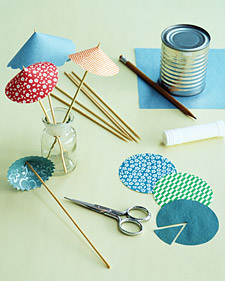
~How To Make Festive Drink Umbrellas~

I came across these origami drink umbrellas on Martha Stewart’s website.  These umbrellas are the perfect addition for your next BBQ and would be easy and fun for kids and adults to create.  All you need are a few simple materials:

* Origami paper (or any type of paper will work)

* Glue stick or double sided tape

* Scissors

* Wooden skewer

Festive Drink Umbrellas: Umbrella How-To

Here are the directions from MarthaStewart.com:

A soup can makes a handy template for origami-paper umbrella tops. Cut paper with pinking shears or scallop scissors for a decorative edge. From each circle, remove a pie-slice shape measuring about 1/8 of the circumference. Fashion into a cone, slightly overlapping straight ends; use a glue stick or double-sided tape to secure. Dab white craft glue inside nose of cone, and pierce tip with a wooden skewer (snip skewer for a custom fit); allow to dry.

Read more at Marthastewart.com: Festive Drink Umbrellas: Umbrella How-To - Martha Stewart Crafts

Monday, July 18, 2011

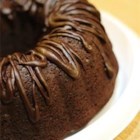
~Recipe Monday–Too Much Chocolate Cake~

This cake is so easy to make and so delicious to eat!  I’ve made this cake twice and it’s been great every time.  What I like about this recipe is you can do do many different variations.  I’d like to try using white cake with white chocolate pudding and white chocolate chips. 

Too Much Chocolate Cake Recipe

Ingredients
  • 1 (18.25 ounce) package devil's food cake mix
  • 1 (5.9 ounce) package instant chocolate pudding mix
  • 1 cup sour cream
  • 1 cup vegetable oil
  • 4 eggs
  • 1/2 cup warm water
  • 2 cups semisweet chocolate chips
Directions
  1. Preheat oven to 350 degrees F (175 degrees C).
  2. In a large bowl, mix together the cake and pudding mixes, sour cream, oil, beaten eggs and water. Stir in the chocolate chips and pour batter into a well greased 12 cup bundt pan.
  3. Bake for 50 to 55 minutes, or until top is springy to the touch and a wooden toothpick inserted comes out clean. Cool cake thoroughly in pan at least an hour and a half before inverting onto a plate If desired, dust the cake with powdered sugar.

Recipe courtesy of www.allrecipes.com

Sunday, July 17, 2011

~25% Off Coupon At Michael’s Arts & Crafts Store~

Michael’s is offering a great coupon deal starting Sunday – July 17th until Saturday – July 23rd. 

25% off your entire purchase including sale items.  These coupons don’t come out very often so take advantage if you can.  Here is a link to the printable coupon if you are interested:

CLICK HERE TO PRINT THE 25% OFF COUPON

Have fun shopping!

Saturday, July 16, 2011

~Be A Happy Camper~

Have a camping trip planned?  Here are some items you can bring on your next camping trip courtesy of the following Etsy sellers.

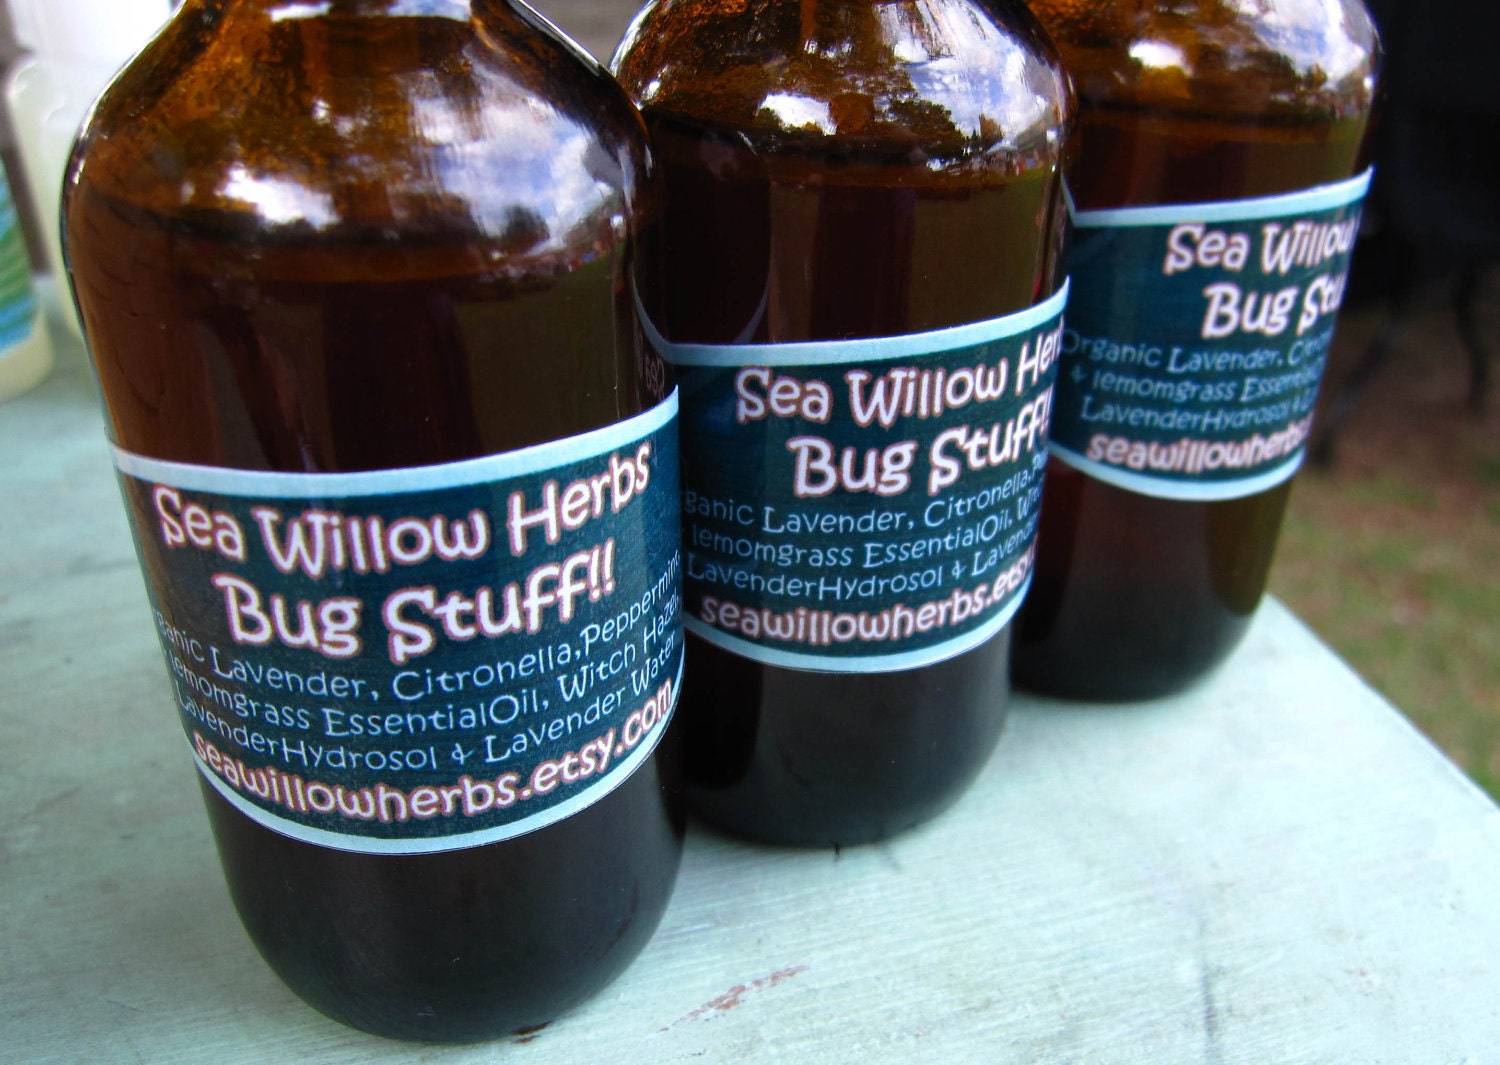
Herbal Bug Spray and Bite Soother- 2 oz Glass Spray Bottle- Organic and Natural

You definitely need some bug repellent when vacationing in the great outdoors.  If you aren’t a fan of using chemicals check out this Organic and Natural Herbal Bug Spray and Bite Soother from Sea Willow Herb’s shop.  Not in need of bug repellent?  Check out Sea Willow’s shop for other natural organic items such as body oil, lip balm, body polish, salt scrub and more!

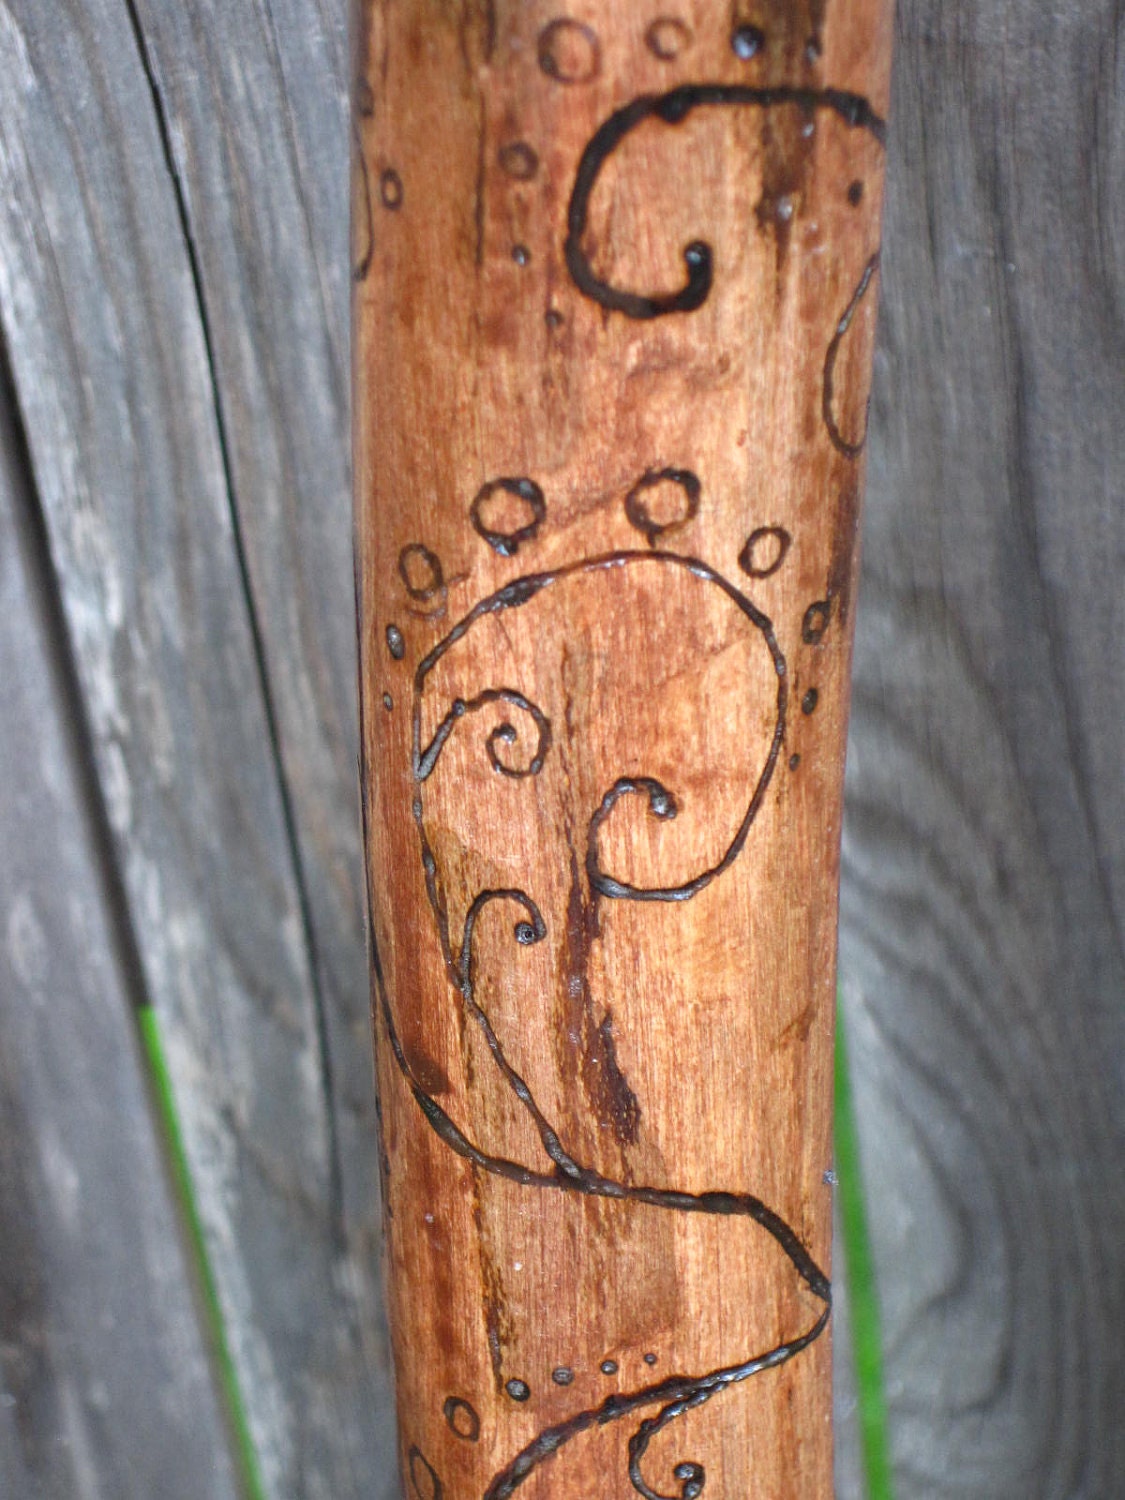
Vines Walking Stick

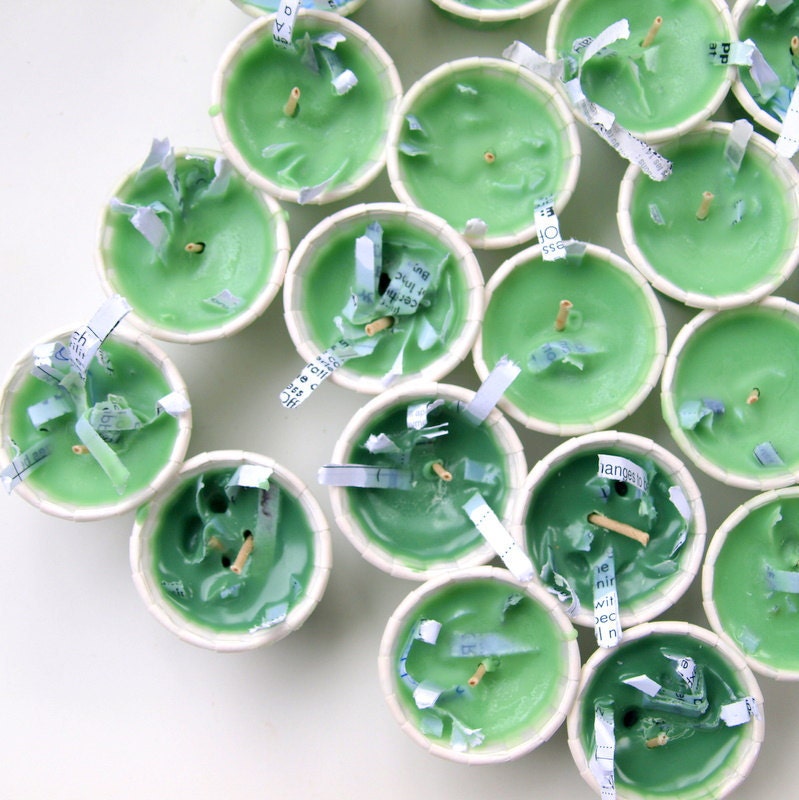
Need a walking stick?  Check out this unique hand made Vines Walking Stick from Wyvern Studio.  Like this walking stick but interested in another design?  check out Wyvern Studio for more along with some other hand made items.20 Mini Woodstove & Campfire Firestarters handmade from Recycled Materials

Need an easy and quick way to start a fire?  Check out these Campfire Starters from Firefly Candle Company.  The best thing about these little starters is that they are made with recycled materials.

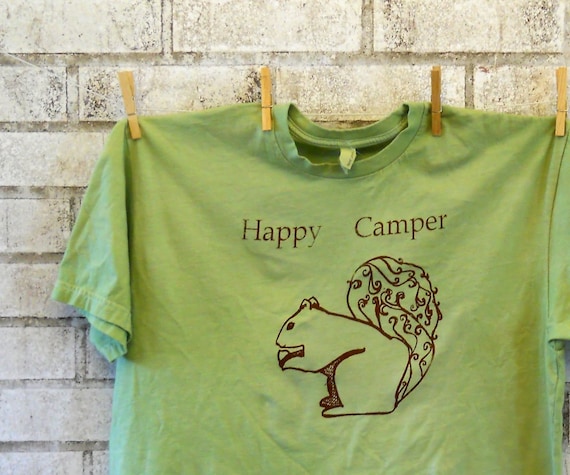
cotton crewneck Men's Happy Camper squirrel  tshirt in brown and apple green or custom colors

In order to be a “Happy Camper” you need to dress the part!  Check out this Happy Camper Squirrel T-Shirt from Caustic Threads shop.  This shirt is made to order which means you can request any one of the many custom colors from Caustic Threads shop. 

Happy Camping!

Tuesday, July 12, 2011

Cocktail Umbrella Lantern How-To

This “How-Tuesday” was published on Etsy a couple weeks ago and I thought it was worth re-posting on my blog.  This is such an easy project and perfect for summer BBQ decorations.  With some adult supervision this would be a great project for kids too. 

Supplies You’ll Need:

  • A paper lantern
  • Cocktail umbrellas
  • A light bulb and light cord
  • A base for your lantern
  • Scissors
  • A glue gun

Step One: Prep!

The first thing you want to do is cut the stems off your cocktail umbrellas. You will need about 30-40 umbrellas depending on the size of your umbrellas and lantern. Make sure you pick enough of each color! Open up your lantern and put it in the base so it won’t roll away.

Step Two: Glue!

Take each of your umbrellas and glue them onto the lantern. Be sure to glue them onto the paper of the lantern, not onto the wire structure. Hold each umbrella snugly against the lantern until the glue dries, then grab another.

Fell free to alternate your colors, make a pattern, or cover one whole lantern in a single color. Keep gluing until your lantern is fully covered.

Step Three: Hang!

With your scissors, carefully cut around the hole at the top of the lantern so you have room to thread  your light bulb and cord inside the lantern.

Thread the light bulb and cord through, hang it up, and let the summer nights continue!

There is a video for this project however I’m unable to post it to my blog for some reason, here is the link:  http://vimeo.com/26024795

Monday, July 11, 2011

~Recipe Monday: Strawberry Frozen Yogurt

This is the perfect recipe to make if you have strawberries that are very ripe and almost mushy.  Turn them into frozen yogurt!  The downside to this recipe is you need an ice cream machine.  It’s definitely worth a try if you have one.  Here is the recipe:

Ingredients
  • 2 cups fat-free plain yogurt
  • 2 cups pureed fresh strawberries
  • 1 (14 ounce) can fat free sweetened condensed milk
  • 1 cup fat-free milk
  • 3 teaspoons vanilla extract
Directions
  1. In a large bowl, combine all ingredients. Fill cylinder of ice cream freezer two-thirds full; freeze according to manufacturer's directions. Refrigerate remaining mixture until ready to freeze. Allow to ripen in ice cream freezer or firm up in refrigerator freezer 2-4 hours before serving. Remove from the freezer 30-45 minutes before serving.

Recipe Courtesy of www.allrecipes.com

Sunday, July 10, 2011

Silver Laurel Paper Garland Cake Decoration How-To

Looking for a unique way to decorate a cake?  Check out this paper garland how-to from Martha Stewart.  The photo is off a wedding cake but you can do this for any cake you make.

1. Fold a strip of metallic paper in half, then use craft scissors to cut out 3/4-inch-long half ovals from the crease to create the leaves.Silver Laurel Garland Cake Decoration How-To

2. Glue them, fold side up, to 4-inch-long pieces of metallic ribbon, leaving a 1 1/2-inch-long "stem."

3. Wrap a short length of ribbon around the end of the bottom leaf, and secure with a dot of glue.

4. Pin to cake.

Read more at Marthastewartweddings.com: Silver Laurel Garland Cake Decoration How-To

Saturday, July 9, 2011

How to Make Paper Pinwheels

Colorful pinwheels, made out of coordinating sheets of origami or lightweight paper, stand tall against a blue summer sky, poised to whirl at the slightest suggestion of wind.

Cut a thin dowel or skewer to desired length (clip pointed end from skewer); paint and let dry. Choose two coordinating sheets of origami or lightweight paper. Cut a square from each the size you'd like your pinwheel to be (ours range from 3 to 6 inches). Use spray mount to glue squares together. Fold in half, diagonally, and in half again, then unfold. Cut along each crease two-thirds of way to square's center, dividing each corner into two points. Bring every other point to center so points overlap. Hold in place, poke a pushpin through center, and, keeping points in place, remove pushpin. Insert a map pin into hole formed (the pushpin hole is slightly larger than circumference of the map pin, enabling the pinwheel to spin). Thread a small bead onto pin behind the wheel, and poke pin into dowel 1/2 inch from top. To prevent wood from splitting, soak the dowel tip in water before inserting map pin.

Courtesy of Martha Stewart

Monday, July 4, 2011

~Recipe Monday: Maple-Drizzled Apple Muffins~

I made these awesome muffins this weekend.  They were delicious!  If you are a fan of apple cake then you should try these maple glazed muffins. 

Ingredients
  • 1 1/3 cups all-purpose flour
  • 1 cup quick-cooking oats
  • 2/3 cup sugar
  • 1 tablespoon baking powder
  • 1 1/2 teaspoons ground cinnamon
  • 1/2 cup milk
  • 1/3 cup butter or margarine, melted
  • 1/4 cup maple syrup
  • 1 egg, lightly beaten
  • 2 cups chopped, peeled apples
  • 12 pecan halves
  • GLAZE:
  • 1/3 cup confectioners' sugar
  • 2 tablespoons maple syrup
Directions
  1. In a large bowl, combine flour, oats, sugar, baking powder and cinnamon. In a small bowl, mix milk, butter, syrup and egg; stir into dry ingredients just until moistened. Fold in apples. Fill greased or paper-lined muffin cups three-fourths full. Top each with a pecan half. Bake at 400 degrees F for 18-20 minutes or until muffins test done. Cool in pan 10 minutes before removing to a wire rack. Cool completely. For glaze, mix sugar and syrup; drizzle over muffins.

ENJOY!

Recipe courtesy of www.allrecipes.com

Saturday, June 25, 2011

~Six Months Until Christmas!~

Christmas is my favorite holiday and as of today it is six months away.  This makes me excited but also a little anxious.  You may think six months is a long time but really before you know it the holiday season will be here.  Seems like every year the Christmas season starts a little earlier than the last.  I’ve see Christmas items come out as early as Halloween.  Either way it doesn’t matter because this year I will be READY!  Ok, every year I say this but I really want this to be my goal this year.  Typically I shop year round.  I already have more gifts stashed away this year than I have in the previous years so I’m feeling good about having shopping done early.

Me with all my ornaments, yes I have a lot and each year I collect more! IMG_9571For those of you that live in Washington you know so far our spring and summer has been pretty glum...  It’s almost July and we have maybe had a handful of sunny days in the 70’s with no rain and blue skies.  So you might think I’m crazy for talking about winter with our summer being so lacking but I’m looking at the “bright” side.

Our Christmas tree last year.  This year it will be bigger!IMG_9576

My kitty Stamper.  He loves Christmas too! IMG_9566

Let the Christmas Count Down Begin!

Monday, April 11, 2011

Recipe Monday: Kettle Corn

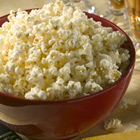
Kettle Corn is one of my favorite “game day” snacks.  This salty and sweet snack goes great with baseball and soccer season.  It’s a great snack for kids and adults alike.  I tried this recipe out because I love buying kettle corn when we go see the Sounders play.  For those who aren’t from Seattle the Sounders are Seattle’s awesome Major League Soccer Team!  We are season ticket holders and have been since the first season.  We just started the third season.  It’s great to go to games however it’s not so great paying stadium prices for food and drinks.  Even though you can’t bring beer in to the stadium you can bring bottled beverages (still sealed) and food.  I decided to try out this kettle corn recipe since I’m always buying it at the stadium at $5 per bag.  After purchasing all the ingredients for this recipe I spent about $5 and can make kettle corn for each home game plus some!  I just saved a ton of money.  Here is the recipe if you are interested in making your own game day snack.

Prep Time: 5 minutes  |  Cook Time: 15 minutes | Yields about 5 servings

Ingredients
  • 1/4 cup vegetable oil
  • 1/4 cup white sugar
  • 1/2 cup unpopped popcorn kernels
    Directions

    Heat the vegetable oil in a large pot over medium heat. Once hot, stir in the sugar and popcorn. Cover, and shake the pot constantly to keep the sugar from burning. Once the popping has slowed to once every 2 to 3 seconds, remove the pot from the heat and continue to shake for a few minutes until the popping has stopped. Pour into a large bowl, and allow to cool, stirring occasionally to break up large clumps.

    *Note:  I like to add some sea salt to my popcorn once finished.  After the popcorn cools down fill a bag full and pack it up to take to the game. 

    For a direct link to this recipe click HERE.

    Tuesday, April 5, 2011

    Tulip Treasury

    I love tulips…but not as much as the previous owners of our home did.  Last year we closed on the house the end of April and the tulips had already sprouted and bloomed.  Here is a picture of me last year with the yellow tulips.  Once the yellow tulips were done blooming and slowly started to die red tulips started to come up.  This past weekend I decided to de-clump the tulips and disperse them throughout our garden beds for more color.  There are so many to move!  Our goal is to re-landscape the area I am standing in but I don’t want the tulips to get ruined.  Needless to say I still have lots more to move.  I thought putting together a tulip treasury would be fitting.  Here are some of my favorite tulip items made by Etsy sellers.    IMG_7374

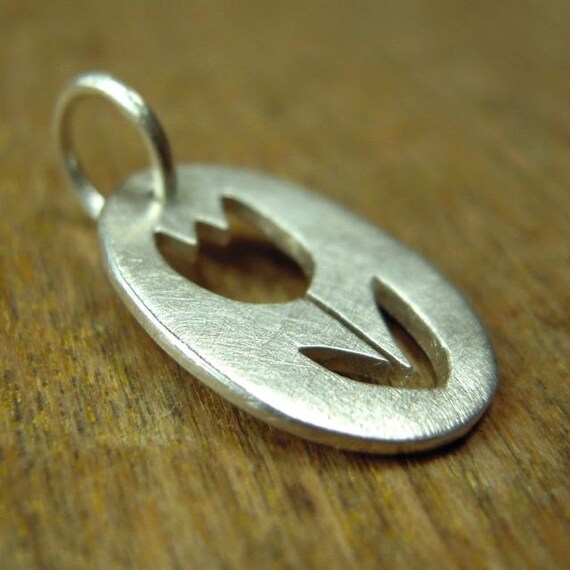
    This Sterling Silver Tulip Charm Pendant is hand cut.  What a special necklace to buy for a gift or for yourself.  You can find this necklace for purchase at Erin Bowe’s Etsy Shop

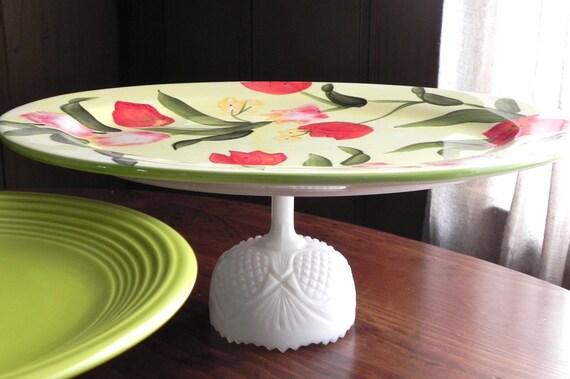
    Need a cake stand?  Check out this amazing Tulip Garden Pedestal Cake/Dessert Stand from Isabella Designs on Etsy.  This gorgeous cake stand was featured in Martha Stewart Weddings.

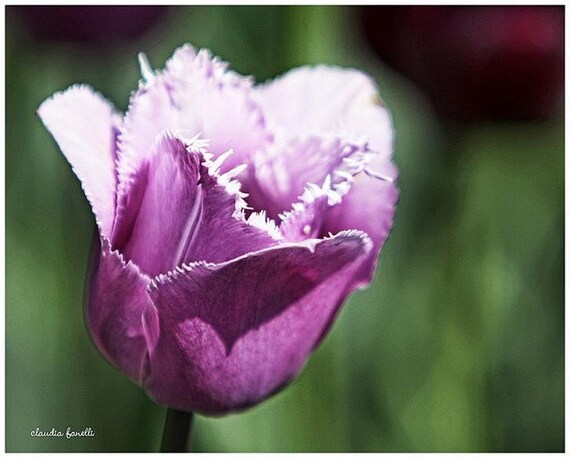
    My favorite color is purple so naturally this Perfect Purple Tulip Photograph caught my eye.  Like this photo?  Take a look at Shutterbug Creations Etsy Shop for more beautiful flower photos.

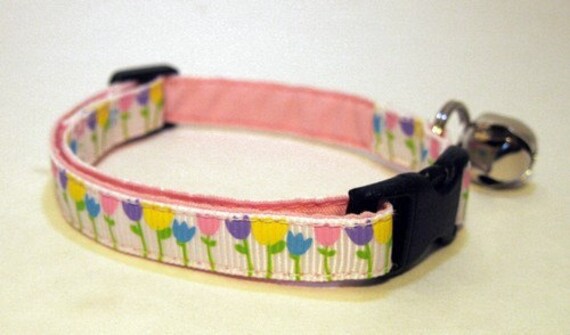
    This Tulip Cat Collar screams spring!  Buy this cute color for your little kitty today from Bigpaw Collars Etsy Shop.

    Monday, April 4, 2011

    Recipe Monday: Crumb-Coated Chicken Thighs

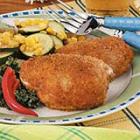
    I was looking for an easy recipe to cook dinner the other day and came across this one on All Recipes.  Not only was it super easy to make but I had all the ingredients on hand. 

    Here is the recipe if you are interested in making some quick and easy chicken!  I imagine you could use any piece of the chicken but I followed the recipe and used thighs.  Make sure to remove the skin prior to coating!  This way you can eat the yummy topping unless you can afford the calories/fat in eating the skin.

    Prep Time: 10 minutes | Cook Time: 35-45 minutes |  Yields 4 servings

    Ingredients
    • 1/4 cup dry bread crumbs
    • 1 teaspoon salt
    • 1 teaspoon ground cumin
    • 1 teaspoon paprika
    • 1 teaspoon chili powder
    • 1 teaspoon curry powder
    • 1/4 teaspoon pepper
    • 8 (5 ounce) chicken thighs, skin removed
    • Directions
      In a large resealable plastic bag, combine the first seven ingredients. Add chicken, a few pieces at a time, and shake to coat. Place on a baking sheet coated with nonstick cooking spray. Bake, uncovered, at 400 degrees F for 20 minutes. Turn chicken pieces; bake 15-20 minutes longer or until a meat thermometer reads 180 degrees F.

      For a direct link to this recipe click HERE

    Sunday, April 3, 2011

    Kindle Addiction

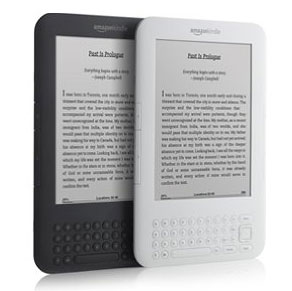
    I have always loved to read.  To me reading is relaxing.  You can use your imagination unlike watching TV.  Before my Kindle I used to go to Half Price Books and stock up on books.  I would trade books with family and friends.  I never kept books on a shelf unless it’s a book I absolutely love like my Dewey book.  Typically it would take me a few weeks to finish an average size novel, maybe 350 to 500 pages.  Now I’m reading books at lightning speed!  Well, maybe not that fast but you know what I mean.   

    IMG_9678Last Christmas my husband bought me my Kindle and it really has changed the way I read books.  I read more often than I ever did before.  Since Christmas last year I have read 6 books in 3 months.  That’s a record for me!   The convenience of such a small device definitely adds to my Kindle reading addiction.  I like to read before bed and holding a Kindle is so much easier and more comfortable than a paperback book with my Mighty Bright Book Light attached to it.  I have the Kindle cover with light now and love it!  The best part about it is that the LED light runs off the Kindle battery.  It does drain the battery a little faster but not by much…no more buying AAA batteries for my Mighty Bright Book Light.  Kindle goes green in more ways than one!      
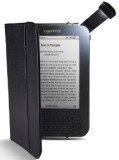
    The best part about the Kindle is that it is user friendly and the books are competitively priced.  The abundance of free books is impressive.  I have just reached 100 books and I’d say that 90 of those are free!  If you are on Facebook you should definitely become a “fan” of the Kindle Page and my new favorite Pixel of Ink.

    I see one issue with my Kindle addiction…it is competing with my crafting addiction!  I guess having choices is good!  Happy Reading! clip_image002

    Tuesday, March 29, 2011

    Traditional Greeting Cards vs. Electronic Greetings

    Checking the mail is not any fun when all you see is junk mail, credit card applications, catalogs and bills!  Every now and then you may be interested in a piece of junk mail or the occasional coupon but typically it all goes in the shredder never to be seen again.  Mail is a necessary evil.  We will never stop receiving it.  You can complete an opt out form, you can sign up for e-bills, you can call creditors and tell them to stop sending you credit card applications but it will continue to be delivered. 

    Why not brighten someone’s day by sending a greeting card?  Personally I love going through the mail to look for coupons and grocery ads…but nothing makes me more happy then seeing a hand addressed envelope!   

    Traditional Greeting cards are tangible.  They show the recipient that you took time to choose a card, personalize it, address it and put it in the outgoing mail box.  E-Cards come in an array of colors, themes, can be animated and play music, and are sent within minutes with little to no time spent.  E-Cards are immediate but tend to be more casual and their place in the professional world can be questionable.  You might find greeting cards proudly displayed on the mantle above the fireplace but the chances of someone printing out their E-Card to display is slim.
    To me it’s personal preference.  Whether you send a traditional greeting or an E-Card it’s the thought that counts.  Being a greeting card maker of course I’ll tell you that the traditional card outweighs the electronic version.  I have to say that when I am the recipient of a tangible greeting card nothing means more.

    I pledge to keep on designing, personalizing, hand addressing, and stamping traditional greeting cards to send to my family and friends.  It’s a great feeling to hear the gratitude in their voice after opening the card.  So much better than getting a reply message in my email saying thank you.

    Sunday, February 6, 2011

    Make Cake Balls Instead of Cookies For Valentine’s Day!

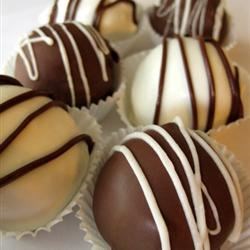
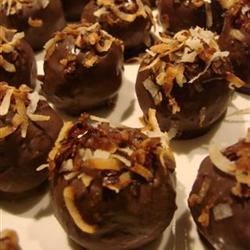
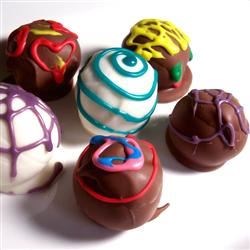
    Looking for a fun Valentine’s Day baking project?  Try making these amazing Cake Balls!  These are easy to make and fun to decorate.  Perfect fun for kids and a great alternative to making cut out sugar cookies that are a lot of work to make. 

    Prep Time:
    40 Min
    Cook Time:
    30 Min
    Ready In:
    1 Hr 10 Min
    Original Recipe Yield 3 dozen
    Ingredients
    • 1 (18.25 ounce) package chocolate cake mix
    • 1 (16 ounce) container prepared chocolate frosting
    • 1 (3 ounce) bar chocolate flavored confectioners coating
    Directions
    1. Prepare the cake mix according to package directions using any of the recommended pan sizes. When cake is done, crumble while warm into a large bowl, and stir in the frosting until well blended.
    2. Melt chocolate coating in a glass bowl in the microwave, or in a metal bowl over a pan of simmering water, stirring occasionally until smooth.
    3. Use a melon baller or small scoop to form balls of the chocolate cake mixture. Dip the balls in chocolate using a toothpick or fork to hold them. Place on waxed paper to set.

    *Recipe courtesy of AllRecipes.com*