Monday, November 14, 2011

~Handmade Holiday Tradition/Esty Greetings Blog Hop: How To Make Danish Christmas Hearts~

Are you like me and have a lot of scrapbooking paper?  I have been looking for different and creative ways to utilize my papers especially the scraps.  Recently my in-laws went to DenmarkMy mother in-law knows how much I love to craft with paper so she brought me back this book: 
Inside there are about 150 Christmas heart patterns.  These paper hearts originated as a Danish Christmas ornament, but, filled with candy, flowers or a love note, it makes a great gift for anyone year round. 
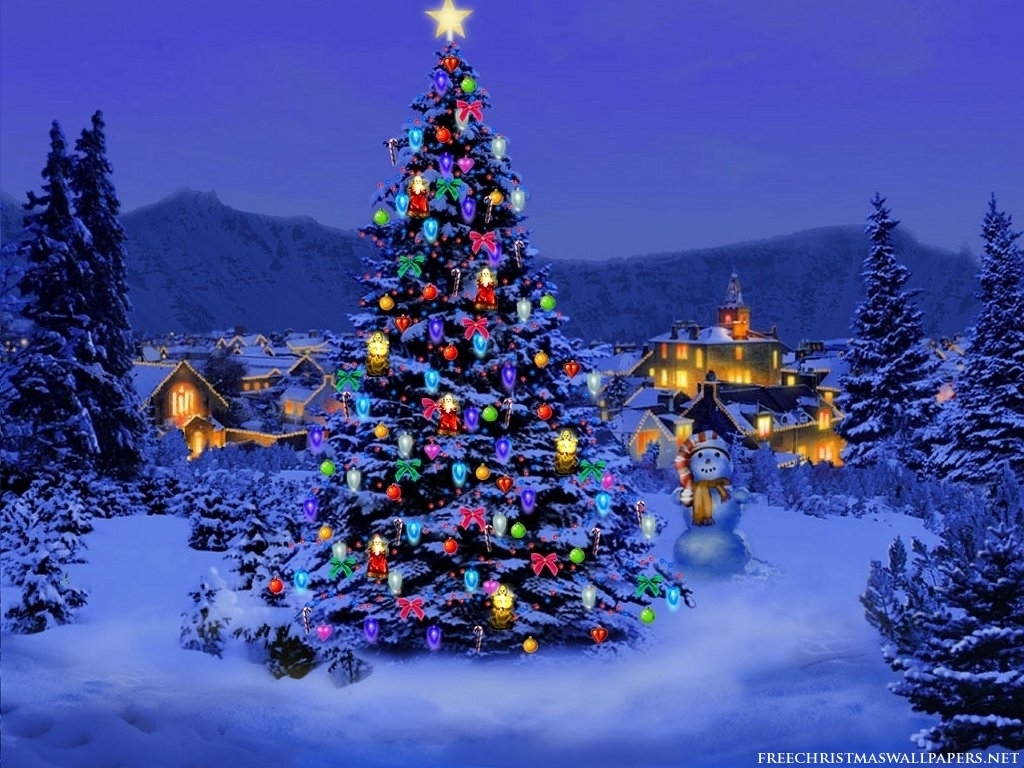
Typically Norwegians don't put as many decorations on their Christmas trees as Americans, and most Norwegian decorations are hand made. Woven heart baskets decorations are typically made from good quality paper in two contrasting colors (often one of the colors is bright red). A good quality gift wrapping paper is a great material to use. Hang the little baskets on the tree either empty or with a few small treats in them. Virtually every school-age child in Denmark learns to make these woven hearts.
Today, with all the design variation, these can be also be used for Valentine's day, gift-tags, invitations, thanks-you cards, etc. It's fun to try all the various types of shapes that are available.
IMG
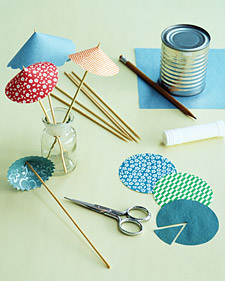
Here is the basic Christmas heart pattern with instructions on how to weave along with the pattern.  Print out the pattern below and use it as your template.  The straight edge needs to be on the fold.  You will need to cut one of each color.  If the pattern is too small you can always enlarge it on a copier.  
Interested in learning more about Christmas traditions in Denmark?  Visit these websites to learn more:
Visit Denmark
Family Christmas Traditions
Holiday Traditions in Denmark
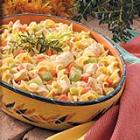
Danish Christmas Dinner Menu & Recipes


Sit back, relax and take a stroll though our Holiday Traditions Blog Hop. You'll find poignant stories, yummy recipes and great holiday printables.  Click the arrows above to go to the next blog in the hop. There's no time limit so feel free to browse our blogs - maybe you'll find a new tradition to start with your family!
 
Interested in more Danish Christmas heart patterns?  Become a fan of the Sno Valley Greetings facebook page and watch for more patterns to try out.

Tuesday, November 8, 2011

~Etsy Greetings Team: Holiday Boutique Sales Event~

Starting November 7th the Etsy Greetings Team is hosting a holiday boutique sales event.  It is a perfect way to stock up early on your holiday greetings and get a great sales price!  The event will run until November 14th.  Each shop is featuring a different sale.  To search all of the shops go to Esty.com and use search words “egholiday”.

My shop, Sno Valley Greetings, is offering 10% off your entire order.  At check out please type in HOLIDAY10 to automatically receive the sale price. 

Happy Shopping!

Monday, November 7, 2011

~Recipe Monday: Chicken Noodle Casserole~

This past weekend I really wanted to make a casserole for dinner.  With the weather getting colder it sounded perfect.  I had all the ingredients for this casserole so I gave it a try.  It must have been delicious because me and the hubby ate about half of the casserole! 

I had to use penne pasta and instead of cheddar cheese I used a cheese blend.  Prior to putting the casserole in the oven I sprinkled a layer of frozen peas on top then finished it off with a bread crumb and olive oil mixture.  I baked it for 20 minutes at 350 and it came out amazing!  We sprinkled some grated parmesan to make it a true pasta dish.

Prep Time: 20 minutes | Cook Time: 15 minutes | Ready In: 35 minutes
Ingredients
  • 2/3 cup chopped onion
  • 1 garlic clove, minced
  • 1 tablespoon olive or canola oil
  • 1 1/2 pounds boneless skinless chicken breasts, cut into 3/4-inch cubes
  • 1 (14.5 ounce) can chicken broth
  • 1 1/2 cups chopped carrots
  • 3 celery ribs, chopped
  • 1/2 teaspoon dried savory
  • 3 tablespoons butter or stick margarine
  • 3 tablespoons all-purpose flour
  • 3/4 teaspoon salt
  • 1/8 teaspoon white pepper
  • 1 1/2 cups 2% milk
  • 1 1/4 cups shredded reduced-fat Cheddar cheese
  • 8 ounces wide egg noodles, cooked and drained
Directions
  1. In a large nonstick skillet, sauté onion and garlic in oil until tender. Add chicken; cook and stir until no longer pink. Add the broth, carrots, celery and savory. Bring to a boil. Reduce heat; cover and simmer for 10-15 minutes or until vegetables are tender.
  2. Meanwhile, in a saucepan, melt butter. Stir in the flour, salt and pepper until smooth. Gradually add milk. Bring to a boil; cook and stir for 2 minutes or until thickened. Remove from the heat; stir in cheese until melted. Pour over chicken mixture. Add noodles; mix well.
  3. Transfer to a 3-qt. baking dish coated with nonstick cooking spray. Bake, uncovered, at 350 degrees F for 15-20 minutes or until bubbly.

*Recipe courtesy of All Recipes*

Sunday, November 6, 2011

~The Holidays Are Right Around The Corner~

Now that Halloween is over Thanksgiving and Christmas will soon be here.  Are you getting ready for the holidays?  Even though I shop for gifts year round there is still so much to do!  Every year there are things that I want to do and unfortunately I run out of time.  This year will be different.  Here are the things I have accomplished so far this year: 

  • I’ve been clipping coupons and stocking up on ingredients for turkey day.
  • I’ve dug up my recipes for Thanksgiving.
  • I was accepted to be a vendor at the Holiday Bazaar at the Si View Community Center in North Bend.
  • I have hand made approximately 150 holiday greeting cards that I plan on selling at the bazaar and in my etsy shop.
  • I’ve started to list holiday cards in my shop, Sno Valley Greetings.
  • I have about half of my Christmas shopping done. (yay!)

Here are my goals for November:

  • Make a food donation to the Mt. Si Food Bank.  Currently they need turkeys, click HERE for details on how and when to donate.
  • Finish the rest of my Christmas gift shopping.
  • Buy wrapping paper and maybe start wrapping gifts.
  • Continue to make cards and gift tags to sell at the holiday bazaar.
  • Decorate the house! (my favorite part)
  • Get our Christmas tree (this year we are looking for a 10 foot tree)

What are your holiday plans and goals you would like to accomplish?

Sunday, October 30, 2011

~How to make a paper wig~

While browsing Martha Stewart’s website this morning I came across this tutorial.  This is such a great alternative to buying an expensive wig that you may only wear once or twice for Halloween, plus it is eco-friendly!  

If you don’t like the “newspaper print” look you could always spray paint or spray glitter the paper.  Here are the directions to make this unique costume accessory:

Tools and Materials
Plastic grocery bag
Scissors
Round object to use as a head form (we used a cabbage)
Masking tape
Newspaper, thin colored paper, or curling ribbon for "hair"
Double-sided tape
Paper Wigs How-To

1. Cut down a plastic grocery bag to create a single sheet of plastic. Place plastic sheet over cabbage.

2. Apply strips of masking tape to plastic, overlapping each slightly, until you have formed the shape of a skull cap. Add two to three more layers of masking tape to create a firm wig base.

3. Remove cap from cabbage, and trim excess plastic around cap. To add extra support, place a few strips of masking tape around the edge and inside the skull cap.

4. Place cap back on the cabbage and begin styling the wig. Cut colored paper or newspaper to 1/2-inch strips, or cut lengths of curling ribbon to create hair. Curl "hair" by carefully dragging across the closed blade of a pair of scissors.

5. Add 4- to 6-inch strips of double-sided tape to the bottom rim of the cap, and begin adding hair. Continue adding more tape and "hair" strips until you reach the crown of the cap and the wig is full.

*Tutorial courtesy of MarthaStewart.com – for the original tutorial click HERE*

Wednesday, August 17, 2011

~Seashell and Pebble Stationery–DIY~

If you want to make your own stationery and have a lot of shells and pebbles laying around try this project courtesy of www.marthastewart.com.

The verbiage below is taken directly from Martha’s website:

Decorate stationery, postcards, or a travel journal using tokens collected on a recent trip. 

Lay shells or stones on thick paper, and spray the area with watered-down paint. Abstract patterns emerge on the paper underneath, recalling a dappled sky.

Sprayed Stationery How-To:


1. Cover your work surface.

2. Add 1 teaspoon acrylic paint to a small spray bottle. Fill halfway with water; shake to mix. (For a more translucent solution, add more water.) 

3. Arrange shells or pebbles on note cards or another paper item. 

4. Spray paint mixture over shells or pebbles. Let dry for about 30 minutes before lifting objects. 

Tip:  Card stock or other thick paper works best; it's less likely to warp.

Tuesday, July 19, 2011

~How To Make Festive Drink Umbrellas~

I came across these origami drink umbrellas on Martha Stewart’s website.  These umbrellas are the perfect addition for your next BBQ and would be easy and fun for kids and adults to create.  All you need are a few simple materials:

* Origami paper (or any type of paper will work)

* Glue stick or double sided tape

* Scissors

* Wooden skewer

Festive Drink Umbrellas: Umbrella How-To

Here are the directions from MarthaStewart.com:

A soup can makes a handy template for origami-paper umbrella tops. Cut paper with pinking shears or scallop scissors for a decorative edge. From each circle, remove a pie-slice shape measuring about 1/8 of the circumference. Fashion into a cone, slightly overlapping straight ends; use a glue stick or double-sided tape to secure. Dab white craft glue inside nose of cone, and pierce tip with a wooden skewer (snip skewer for a custom fit); allow to dry.

Read more at Marthastewart.com: Festive Drink Umbrellas: Umbrella How-To - Martha Stewart Crafts