Monday, December 13, 2010

10 Gift Ideas For Co-Workers and Bosses

This subject comes up every year.  You want to give your co-workers and/or boss a gift for the holidays however you don’t want to be too personal or exorbitant.  You don’t want to go over the top and spend a lot of money yet you don’t want to look tight fisted and frugal. 

Here are some unique ideas that are unique and won’t break the bank.

1.  If you are crafty create a mini scrap book of a memorable event that happened in the office.  Maybe the office got together and had a surprise birthday party.  If you aren’t crafty you can always buy a nice photo album and fill it with the photos. 

2.  Picture frames are always a nice gift especially if you have a picture to go in it.  Consider getting together with some co-workers to take a picture for the frame.  If you don’t have a picture you can always frame a gift card to their favorite store, restaurant or coffee shop.

3.  Edible gifts such as chocolate, candy, meat/cheese, fruit, popcorn etc…are usually safe gifts to give.  If you are worried that it’s not enough or you don’t want to look cheap bump it up a notch and buy some finer chocolates.  Are you a baker?  Make everyone a special goody tin with baked goods.  Don’t forget to be wary of food allergies! 

4.  Give Wine, Champagne or Liquor!  Typically you can’t go wrong with a nice bottle of bubbly…just make sure the person you are giving too drinks.

5.  Give a book if you know their favorite author or genre.  If you don’t buy a gift certificate to a book store. 

6.  Gift certificates are always a safe bet.  If you can spend a good amount of $ go for a gift card to a restaurant.  If you are looking on the lower end of the spectrum buy a gift card to a coffee, ice cream or smoothie shop.

7.  If the person you are buying for works at a desk check it out.  Do they need anything?  Many people like to personalize their desks with pencil/pen cups, staplers, tape dispensers, etc…If you know what type of pens they like to use buy them a pack.  You can never have too many pens.  To finish the gift buy a few nice notepads.

8.  Mugs and cups for the coffee and tea drinkers.  You can’t go wrong with this gift.

9.  Key Chains.  Everyone has keys.  Add a personal touch and get a monogram key chain.  Don’t go all out tacky unless you know the person well and/or it’s a joke.  You can always engrave the key chain to make it more personal.

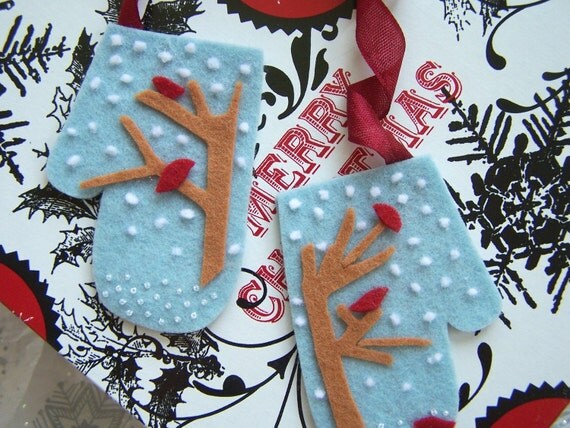
10. Holiday Ornament.  Only go to this idea if the person you are giving to celebrates the holidays with a tree!

Hope these ideas help.  If you have any other ideas feel free to comment on this post.  Remember giving gifts is not a necessary act.  You should always give a gift with thought and heart. 

Happy Holidays!

Wednesday, December 8, 2010

Wedding Wednesday–Beaded Snowflake Ornament Favor

These Snowflake Ornaments make amazing favors and fit a winter themed wedding quite perfectly.

Beaded Snowflake Ornament

What You Need:

For each snowflake:

  • 10 corsage pins with pearl ends
  • Crystal-like beads in desired shapes and sizes
  • 1 small cork
  • Iridescent white glitter paint pen (usually used for fabric)
  • Monofilament thread

Instructions:

1. Add beads to 4 pins. Place beads on 1 corsage pin in desired order, leaving the last 1/4 inch without beads. Make 3 more beaded pins using the same arrangement.

2. Make another set of 4 beaded pins, using a different arrangement. Make an additional set of 2 beaded pins. (You should have a total of 10 beaded pins.)

3. Add 4 matching pins to cork. Cut the cork, if necessary, so it is about 1/4 inch long. With the round side of the cork laying on the work surface, poke one beaded pin into the cork (close to work surface) like a spoke of a wheel. Place a matching beaded pin opposite the first. Place the remaining two opposite each other, between the first set.

4. Add remaining pins. Using the remaining set of 4 matching pins, poke each into the cork, slightly closer to the top of the cork and alternating with the first set of four. Place the remaining 2 beaded pins into each round end of the cork.

5. Cover the cork using glitter paint pen. Allow to dry. Apply a second coat, if necessary, and let dry.

6. To hang, cut a desired length of monofilament and tie to one spoke of the snowflake.

Original project idea from BHG.com | Click HERE for the link.

Tuesday, December 7, 2010

Monday, December 6, 2010

10 Holiday Card Tips

1.  If you are uncertain if the recipient celebrates Christmas, Hanukkah, or another religious faith or tradition then send a neutral card that says “Happy Holidays”, “Season’s Greetings”, “Warm Wishes For A Happy Holiday Season”, or “Peace on Earth”.

2.  Write a short note inside the card.  Don’t just sign you name, besides, the whole point of sending a holiday card is to get personal.

3.  Include a family photo and write a caption on the back.  Be sure to include kids names/ages and where/when the photo was taken.

4.  Remember to include a return address on the envelope.

5.  Send a card to everyone who sends you one.

6.  Be sure to mail your holiday cards out so they arrive prior to the actual day.

7.  Hand addressing the envelope is more personal than a label.

8.  Email greetings are not a substitute for an actual holiday card.

9.  If you write a holiday newsletter make sure you don’t over-do it.  Only include the highlights from the past year and be sure to keep it on one page. 

10.  Support local artists and buy handmade at www.etsy.com

Friday, December 3, 2010

Recipe Friday–Peanut Butter Cup Cookies

I have yet to try this recipe but it looks delicious and if you love peanut butter cups why not give it a try?  The reviews are 5 star and the recipe looks easy.  This recipe is courtesy of www.allrecipes.com

Ingredients
  • 1 3/4 cups all-purpose flour
  • 1/2 teaspoon salt
  • 1 teaspoon baking soda
  • 1/2 cup butter, softened
  • 1/2 cup white sugar
  • 1/2 cup peanut butter
  • 1/2 cup packed brown sugar
  • 1 egg, beaten
  • 1 teaspoon vanilla extract
  • 2 tablespoons milk
  • 40 miniature chocolate covered peanut butter cups, unwrapped
Directions
  1. Preheat oven to 375 degrees F (190 degrees C).
  2. Sift together the flour, salt and baking soda; set aside.
  3. Cream together the butter, sugar, peanut butter and brown sugar until fluffy. Beat in the egg, vanilla and milk. Add the flour mixture; mix well.
  4. Shape into 40 balls and place each into an ungreased mini muffin pan.
  5. Bake at 375 degrees for about 8 minutes. Remove from oven and immediately press a mini peanut butter cup into each ball. Cool and carefully remove from pan.

Nutritional Information

Amount Per Serving  Calories: 122 | Total Fat: 6.5g | Cholesterol: 12mg

For a direct link to the recipe click HERE.

Wednesday, December 1, 2010

Sno Valley Greetings - Cards By Jenna

I've been contemplating changing my card shop name for a while. Cards By Jenna was too plain and boring so...I've officially opened...Sno Valley Greetings! I've been listing new greeting cards in this shop. Cards By Jenna will remain open until I can move all my inventory.

Why the name Sno Valley Greetings? For those of you who know me personally you know that I grew up in Fall City, WA which is part of the "Snoqualmie Valley". I also graduated from Mt. Si High School. Mike and I moved from Issaquah to North Bend this past April. Since I moved back to "the valley" I thought the new name was a perfect fit! Thanks for visiting!